How To Use Snapchat Filters
The makers of Snapchat understand that sometimes your best selfie just isn’t good enough. That’s why they have dozens of filters and photo editing tools to help you turn an ordinary picture into something truly memorable. The only problem is that their filter and editing options are so extensive that they’re downright overwhelming. Luckily, we’ve put together a quick guide to take you through all the Snapchat options.
Selfie Filters
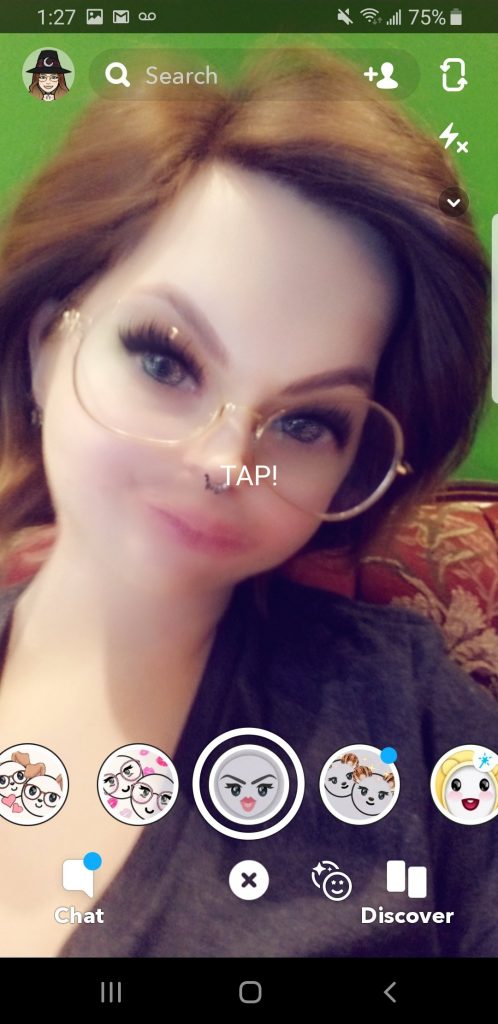
Let’s start with the silliest Snapchat filter options. Snapchat’s creative and engaging selfie filters have been instrumental in putting the popular social media app near the top. To access these filters simply go to the Snapchat camera and follow these steps:
- Tap on the selfie icon in the upper right-hand corner. This will switch the camera so you can see yourself on the screen.

- Tap anywhere on your face to bring up the selfie filter options. They will appear as a series of circles along the bottom of the screen.

- Cycle through the filter options to apply them to your face.
- Tap on the circle at the bottom to take a picture.
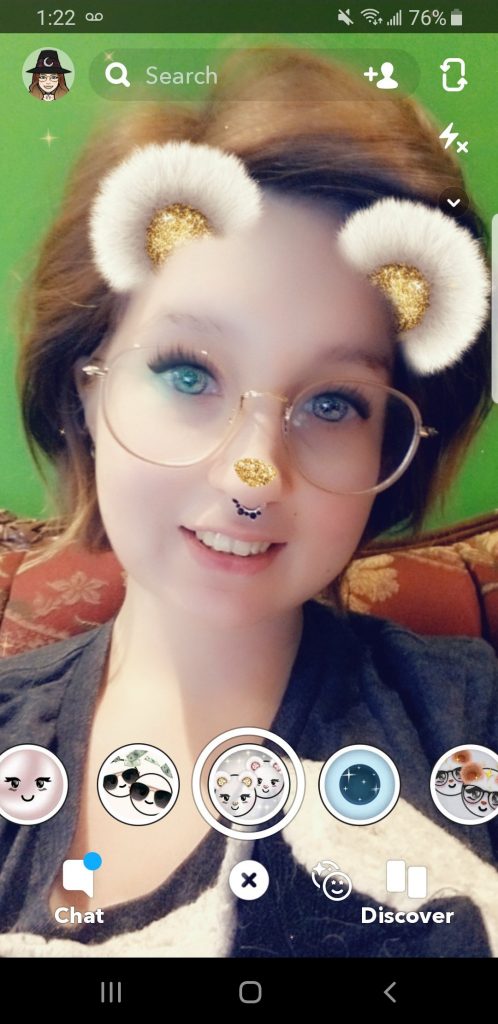
Filter options may change from one day to another. Some may even be sponsored by various organizations. Other popular filters, like the doggie face, stick around for a while.
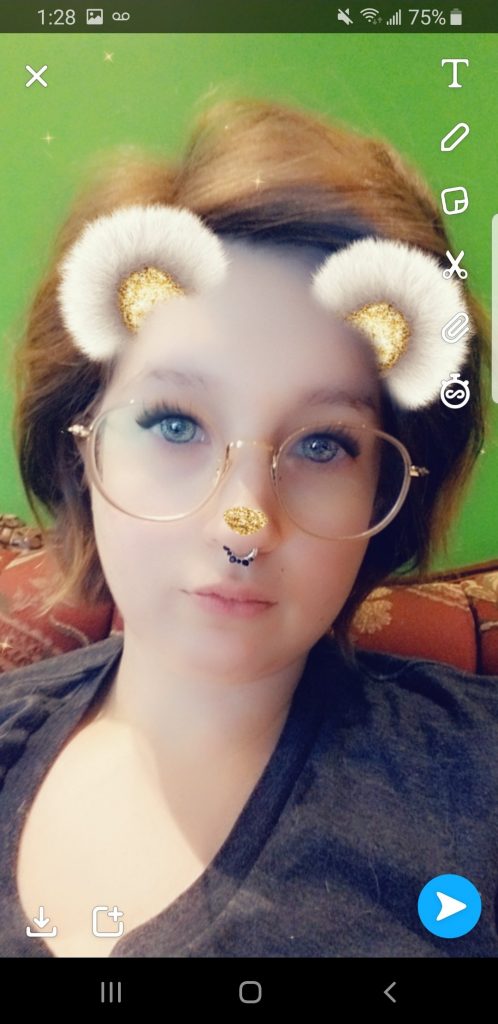
Some filters might come with added features. Watch for directions that ask you to raise your eyebrows or stick out your tongue. Do as directed, and you’ll be in for a surprise.
Finally, try picking a favorite filter and then switching the camera back to face frontward. The chosen filter will augment the reality around you with fun little surprises to add some character to your photo.
Photo Editing Filters
Snapchat also provides filter options for after the photo is taken. These filters are easy to access, if not a tad frustrating to cycle through. Simply swipe left on your photo after it is taken and before it is shared with others. Keep swiping to see more options. Expect to see some or all of the following:
- Color filters – These include gloss, sepia, overly saturated, and black & white.
- Speed – Shows how fast you were going when the photo was taken.
- Temp – Shows the current temperature where and when the photo was taken.
- Altitude – Shows the altitude above sea level where the picture was taken.

- Time – Shows when the photo was taken.
- Location – Might show the name of a city, state, or country where the photo was taken.
- Special days – You might see some filters specific to special holidays or other calendar events.
As you cycle through the filters, tap on the screen for additional options. Some of the filters will change style or format when tapped.
If you want your picture to return to normal, simply swipe to the end of the filters. If you swipe through them all, the next swipe will be your original image.
Photo Editing Tools
If you’re not satisfied with the available filter options, you can always edit your photo using Snapchat’s extensive photo editing tools. Check out our crash course below, but don’t be afraid to just play around a little. Snapchat is always full of surprises.
The photo editing options are available on the right-hand side of the screen after you snap a photo.
![]()
- T – Add text. Type using your phone’s keypad. You can edit the color of the text using the color bar that appears on the right. You can also change the size and format of the text by tapping on it.
- Pencil – Draw. Use your finger to draw. Change the color using the color bar that appears on the right. Change the size of the pen by pinching and pulling with our fingers on the screen.
- Sticker – Add a sticker. Click through the row of icons at the bottom of the screen for additional sticker options. When you choose a sticker, you can use the pinch and pull gesture to change the size of the sticker. Tap and drag the sticker to the trash to remove it. You’ll still be able to add the same sticker later.
- Scissors – This icon will bring up several additional editing options (see below).
Scissor editing options:
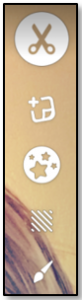
- Sticker – Copy and paste selections from your photo to create custom stickers. Use your finger to trace the portion you want to copy. A sticker will appear. Resize it and trash it like any other sticker. Whether or not you remove it, the sticker will stay in your custom sticker inventory for later use (see the Sticker icon).
- Stars – This is your magic eraser. Drag your finger across parts of your image that you want to remove.
- Grid – This adds a pattern to your picture. The pattern overlays the original image. Trace around portions of your image you want to bring to the foreground.
- Paint Brush – This is a color fill. Select a color. Then trace an object that you want to make a specific color. The color fill will do the rest.
Save it For Later
Not sure how best to make your picture pop? No problem. Tap the save icon in the lower left hand corner. You can access your photo later under Memories. All of the same editing options and most of the same filter options will be available to you.
Snapchat marketing is tough, so why not use this handy book to learn more? You can sell a lot of crazy stuff through snap chat. This book shows you how!
Wanna know what the longest snapchat streak is? The answer may surprise you.